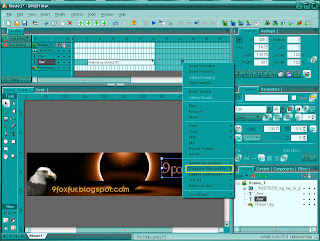
After applying animations on objects as explained in tutorial part 3, the next step is to insert hyperlinks and export the movie.


Notice that one of the text objects in the signature is a link. A hyperlink can be put on the object to enable it to be clicked and it will open the link in a browser window.

  
Click on Script as highlighted in the yellow rectangle to open the Script panel. Make sure the object you want the link to be append to is selected, then click on Add Script, and select Browser/Network. Choose getURL(...).

  
Put the hyperlink in the URL box. Then select the target window. _blank is recommended as this will open the link in a new browser window. The resulting script will be shown in the Script panel. The link can now be clicked.


Click on the Play Movie button to preview the whole movie from the beginning to the end. This is how the animated signature will appear. 


You can also insert some shapes in the signature by using the Tools available in the left side of the Layout panel. Change the orders by moving them either upwards or downwards in the Outline panel. Now it is the time to export the movie.


Click on File,  and select Export. There are many formats available for exporting the movie. Choose either you want the signature in swf or gif format. What is the difference between swf and gif signature? Well, swf or flash signature enables you to put multiple links in one signature, plus other functions such as stop and replay. While animated gif does not provide these functions. You can only put one link with animated gifs. However, not all forums provide the support to put flash signature for the users.

The Export Settings window will appear after choosing the preferred format. Click on OK to export the movie. The animated signature is now finished. Click on the links to view the results:


readmore »»
Wednesday, October 28, 2009

Animated Forum Signature Tutorial - Part 3

After inserting the text and animation as explained in tutorial part 2, the next step is to apply animations to the objects in the signature.


In this part, the most important panel is the Timeline panel as highlighted in the yellow rectangle. You can resize the height of the Timeline panel by dragging the lower border to your desired height.

  
Select the object you want to apply the animation to. For this tutorial, only the texts will be animated, because the imported animation is already.... well, animated. Notice that there are two text objects there. When one is selected, the corresponding text row in the Timeline panel will also be highlighted.

In this image, the yellow and pink rectangles show the corresponding Timeline rows to the objects, which are arranged in order. You can try changing the order of the object and the Timeline row will follow. Change the Timeline panel height to ensure all the rows are visible.


To apply the animation, select which frame you want the animation to start playing on the selected Timeline row. For this tutorial, frame 6 is selected, which means that the animation will start playing on frame 6. Right click on frame 6 and the effects menu will appear. To start the animation, select Appear into position as highlighted in the yellow rectangle.


These are the effects available in the Appear into position menu. Choose whichever you want. For this tutorial, the effect Implode up slowly is selected.

  
 Click the Play Effect button as highlighted in the yellow rectangle to preview the animation applied on the text.You can adjust the length of the effect by dragging the right side of the effect rectangle. The next step is to insert the effect that will end the animation on the object.


 Right click on the frame where you want to end the animation. Spare some frames in between to allow the object to appear static on the signature (in case of text, to allow the text to be read). The effects menu will appear. Select Disappear from position as highlighted in the yellow rectangle. Choose whichever exit animation you want.


Preview the animation by clicking the Play Effect button. Adjust the effect to the desired length.

 
Repeat the steps on the other objects. Notice that the imported animation (the eagle in this case) will appear from the start of the movie to the end  because no entry or exit effects are applied on it. Try experimenting with other effects such Fade, Zoom, Slide, Looping continuously et cetera until you are satisfied with the result. The next step is to insert hyperlinks and export the movie.


readmore »»

The background image for the forum signature has already been displayed as explained in tutorial part 1. The next step is to insert text and animations in the signature.

Click on the Text Tool button as highlighted with the yellow rectangle. Bring your mouse cursor onto the layout panel and click on the spot where you want the text to go and hold your mouse button.

Drag the text box to the appropriate width depending on how long the text will be.

You can change the font color by going to the text properties panel on the right side. The yellow rectangle shows the button for changing the font color.

 
To insert the text, put your mouse cursor in the text box, and type in the text you want to appear in the signature. Don't worry about the excessive space yet. It is recommended that you leave quite a bit of space in case you want to change the font type.

To change the font type, highlight the text and click on the font type dropdown menu in the text properties panel. You can preview the font by hovering your mouse cursor over each type and it will appear on the left side. Choose your preferred font.

The text box can be resized by dragging the right side of the box to the appropriate size. Make sure that the mouse cursor changed to a double-pointed arrow. Leave the text aside for now. The next step is to insert an animation in to the signature.

Click on the Import Animation button as highlighted in the yellow rectangle. The insert animation window will appear. The types of animation files that can be inserted into the signature are swi, swf, exe and gif as shown in the image. This tutorial will make use of a gif file. Choose the animation file that you want to insert and click Open.

 
There are many options shown in the Import window. You can try playing with the options, but it's best to leave it be. Make sure all frames are selected. Click on Import to insert the animation into the signature. Then move or resize the animation until it fits in with the signature.

You can insert additional text or anything else you want in the signature before moving to the next step. The next step is apply animations to the objects in the signature.


readmore »»

Graphical signatures are commonly used by online forumers at the end of their posts in online discussion forums. Most signatures are static picture signatures that usually carry their nicknames and their websites or blogs and such. There are also animated signatures which come in gif format or swf format if allowed in the forum. This tutorial will provide a way to create a simple animated signature with moving texts and pictures. There is only one type of software used in this tutorial, which is Swish Max 2. The trial version of the software can be downloaded from this site:

Swish Max 2 Download

After installing the Swish Max 2 software, open the software and the following window will appear:
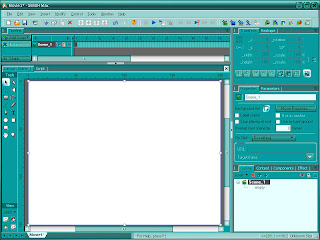
This is the default window setting of the software. The layout panel shows the common size used to create a flash (swf) presentation. However, this size is not suitable for creating an animated forum signature. Therefore, the layout panel has to be resized to suitable dimensions. the first step is to edit the movie properties as shown below:
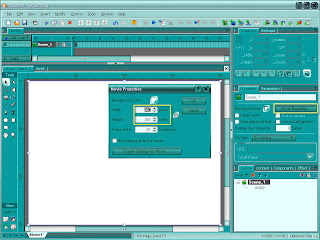
The yellow rectangles show where to click and what to edit. The height and width of the movie need to be the same with the background picture used for the signature. For this tutorial, the following background picture will be used:
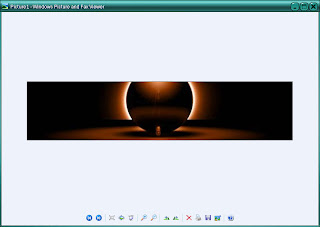
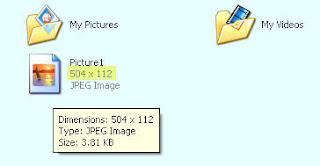
The dimensions (height and width) of the background picture is shown in the yellow box. Use the dimensions to edit the movie properties of the signature.
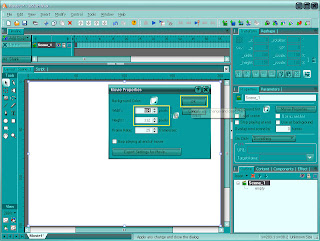
After modifying the width and height of the movie according to the dimension of the picture, click on OK and the layout panel will be resized to the appropriate dimension as shown below:
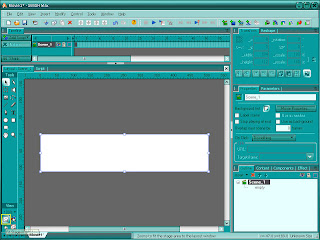
The following step is to insert the image into the movie.
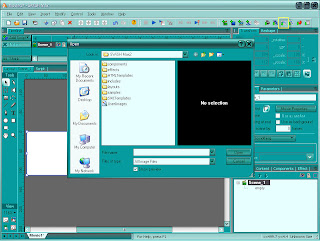
Click on the Insert Image button as highlighted in the yellow rectangle. The insert image window will appear. The left side of the window shows the default installation folder of SwishMax 2, while the right side shows the place for previewing the image.
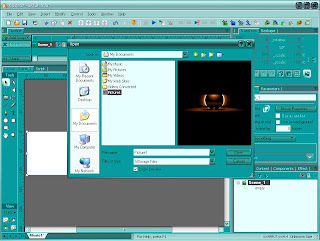
Browse to the folder where the picture is saved. In this example, the My Documents folder is used. Select the picture and it will be previewed on the right side of the window. Then click on Open.


The background image will be displayed in the layout panel. The next step is to insert texts and animations in the signature.


readmore »»


LinkBucks